Showing posts with label wedding bridal makeup. Show all posts

Friday, May 26, 2017

Wedding Makeup Artists Atlanta

You’ll probably never put more effort into looking good than on your wedding day.
If you are thinking of booking a professional make-up artists by Miracle Beauty Salon to design your look for the day, your first consultation should be all talk. Always ask your artist some key points about how and when you feel most beautiful, what style of wedding you are planning, what your usual make-up style is and favourite feature.

The key to a flawless finish is with the correct skincare. “Good makeup always starts with a good base.” Prepping the skin correctly according to the type is essential.
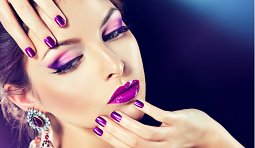
 wedding makeup artists atlanta


You won’t want to spend your wedding day touching-up, so your look needs to last all day – and night. If it’s emotional outbursts you’re worried about, using an eye primer and, of course, waterproof mascara to withstand any tears.

As tempting as it may be, try to go easy on the glow, choose textures that will photograph well.  The real key to finding the perfect nude is simply to try them on.

We understand how important a good makeup artist is to you. We are sure you don’t want to look too make-up, or binged face on your wedding day.


So if you’re overwhelmed sorting through many bridal makeup websites and Facebook pages, try our list of the Best wedding makeupartists in Atlanta. We are trustworthy and highly recommended. Who are recognized for their contribution in creating beauty through cosmetics? 

Sunday, April 23, 2017

Bridal Makeup Tips by Makeup Artist

Here are Important Tips by Miracle Beauty Salon

 bridal-makeup-artist-atlanta


Clean you’re Face
Every brides love to use bold and bright colours for their wedding function. It should remain long-lasting look; you should start with cleaning your face by water and let it be dry to ensure that there are no dirt and oil on skin.

Face Fix up Tips
Two minutes post moisturising, and blend it well. This will help you to keep the makeup intact for long time.

Simultaneously, it is important to cover a spots or darkness. You can brighten up your skin tone by using a coloured Concealer like yellow or green to cover the spots on the skin.

Apply a foundation and blend it well with a makeup brush or a sponge. Let’s start with the center of the face, and then apply the foundation on the other area and blend it outwards.

For glowing look, use a highlighter on the face, such as the check bones, bridge of the nose, on forehead, and bow.

Blush Tips
Take some blush on a blush brush and excess off it on the face. Hold a simple smile and apply it in a rounded motion, blending upwards, and towards the ear side.

 Eye shades Tips
Many brides love the gold makeup since it goes with their red or green lehengas, ghagras, or heavy designer saris.

Use an eyebrow pencil or an angular brush lower in brow powder for the eyebrows.

Eyeliner Tips
Do not try with brown or blue liners on your wedding day. It’s better to use simple plain jet-black liner, reliably waterproof. Do mascaras with curled brushes work better for curly lashes.

Lipsticks Tips
If you have thin lips, then line your lips with colour which mostly matches your skin tone. Getting a lipstick that complements the whole look of you.

Explain Your Needs to The Makeup Artist

If you are appointing a makeup artist, so ensure that you explain what you need clearly. Explaining thing what you need before getting makeup will help you get the look that you want. If the makeup artist is new, then it is always preferred to get a trial session before your marriage day.

Tuesday, March 28, 2017

Guideline to Applying Eye Makeup Steps

STEP 1: Eyes
 Professional recommends applying eye makeup before any other beauty makeup, so colored spots doesn’t fall onto concealer or foundation. Shadow goes first, then liner and after that mascara.
STEP 2: Concealer
For Dark Circles and Spots to prevent shadowy areas, use your finger to pat on a creamy cover-up that is a shade will lighter than your skin.
STEP 3: For Blemishes
Press oil-free moisturiser onto spots first, so this will prevent a cover-up from looking dry or cakey. After that apply a pore-clearing formula with salicylic acid.
STEP 4: Foundation
If you want or need to reduce redness or marks, blend on a lightweight foundation sparingly with your fingers or use sponge.
STEP 5: Powder
For a brighter glow, focus on the upside of the lips and tip of the nose. Also you can use a loose foundation in a deep shade.

STEP 6: Blush
A blush which is use for one shade brighter than you think you want to be, and suggest experts. 
STEP 7: Lipstick
When you want the most finished, and look more attractive, use a stick or stain. Lipstick makes you feel comfortable and easy to access.
STEP 8: Lip Gloss
For the absolute effect, go for gloss. It’s seen light reflecting effect, so it makes lips full. Avoid dark and highly consumed formulas, which can look you dull.
STEP 9: Eyebrows

Finally, at the end of makeup find out how much brows you want. If you’re gone with sober look, simply smooth hairs into place.         

You can get more information by visiting our site. Here is http://www.miraclebeautysalonatl.com

The Difference Between Threading & Waxing by Miracle Beauty Salon

There are different ways to separate a hair without paying a fortune. The most common are waxing & threading . We are going to explain...